Favorite Rider Plugins, Settings, and Features for Unity Development
Programming is hard! Luckily, we have tools and features that help us with this. Rider is not just a text editor. It’s a full IDE – Integrated Development Environment. It has many features and tools that make programming much easier.
Programming is still going to be hard even if we take advantage of all the features Rider can offer. But at least we can spend time working on the challenges that matter and spend less time being frustrated by syntax errors or typing the same thing repeatedly.
These are some of my favorite tips tools tricks and features of rider that should help make your life easier.
Key Unity Features Overview
Before getting my opinions, check out the overview of Unity features that are built into Rider: https://www.jetbrains.com/help/rider/Features_Unity.html
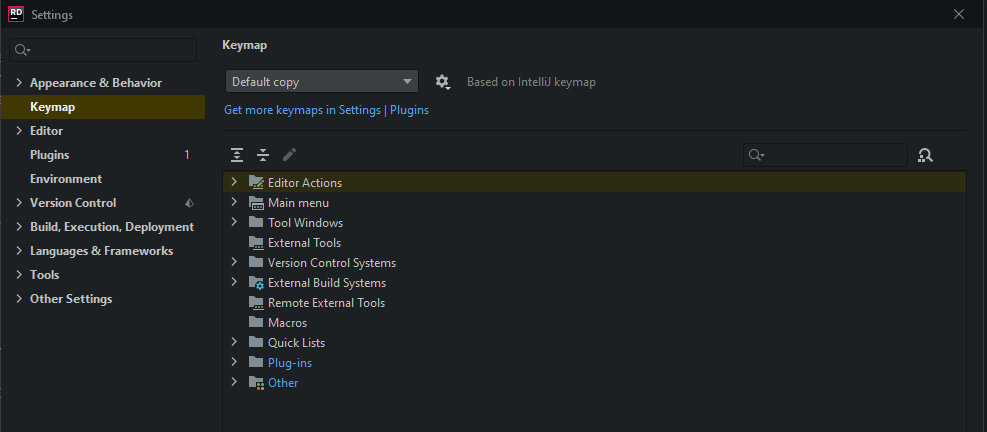
Your Keymap
When you were installing Rider it asked you what you wanted to use for your keymap. A keymap is just the keyboard shortcut layout. Ryder has multiple sets of keyboard shortcuts which makes it easy to transition from one piece of software to another. I recommend you use the IntelliJ keymap. This keymap was created by the developers of Rider.
The main reason to use it is because it's what I use and if you're in my class and I'm explaining how to write code, I'll explain the keyboard shortcuts and it will work for you just like me. Otherwise it's all arbitrary, and you can use whatever you like.
I think most importantly you should be able to go in and change the key keymap and customize it and feel comfortable doing so. If there is a feature you find yourself using all the time put it somewhere that you can get to it quickly! You can always revert to defaults. The software is yours and you should set it up to behave like you want - or at least just not be so annoying.
*Remember, Rider has a cloud settings sync service. You can log onto a new computer, click a button, and get your custom settings right back. *
Search Anywhere
Tap the shift key twice. This brings up a popup window with the search bar. In that search bar start typing. Typing what? Whatever. You can use it to find menu items or hard-to-find actions. You can use it to switch to a different file. Type in the name of a function and you can navigate there quickly.
Using Search Anywhere to quickly switch to a different file
Search anywhere is the most useful keyboard shortcut you can learn. (Second to Ctrl+S: save).
The Structure Window
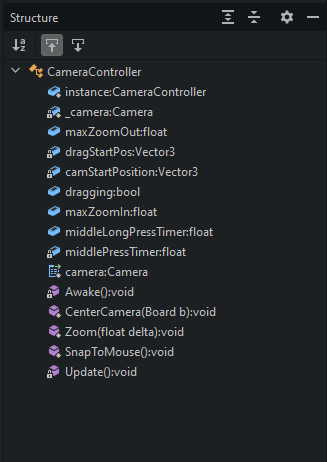
On The left-hand side of the screen there's a tab that says “Structure”. This opens the structure window. I like to keep it open below the File Explorer on the left. Inside of this is an outline of your code. Essentially, it’s a table of contents. You can easily navigate to different functions in variable declarations just by clicking around. It is also nice to look at as an overview of your code or to remember the name of that function without having to scroll up and find it.
Autocomplete
First: Control+space. This is the keyboard shortcut you didn't know you needed. It will open the autocomplete dialog box for wherever your cursor is. Normally that autocomplete box opens automatically, but sometimes it won’t be there when you want it to be. Just hit ctrl+space to bring it back.
This is especially useful for fixing typos, capitalization, another small changes that can be annoying to type out.
Template Completion
One of the autocomplete features is something that rider calls “live templates”. Rider can fill in common bits of code for you.
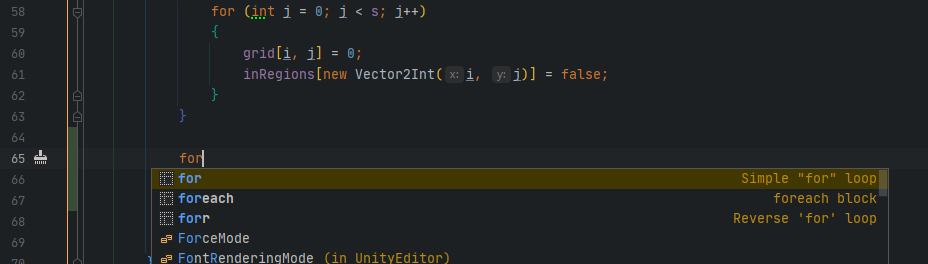
“For” is one of the keywords that brings up template completion. It has a dashed box icon and the orange text that says ‘Simple “for” loop’ on the right. Hitting enter on this will write out an entire for loop for you and move your cursor along the different parts that you might want to change. This is an incredibly useful feature - I use it all the time.
Rider has Unity-specific templates too. Try typing “log” which will auto-type “Debug.Log();” and put your cursor inside the parenthesis. Awesome.
A list is available here: https://www.jetbrains.com/help/rider/Reference__Templates_Explorer__Live_Templates.html
But you can find all of them in Settings>Editor>Live Templates
(Related, check out the alt+insert “generate code” menu. Never type (and misspell) an event function again!)
Reformat Code
Automatically fix all your indents and line breaks with “Reformat Code”. The keyboard shortcut I always forget, but we have the shift+shift Search Anywhere box to find it. (Oh look, it tells us right there, Ctrl+alt+L).
Quick Documentation
My absolute favorite Rider feature is called “quick documentation”. With the cursor on any function, variable or class name (basically anything), Use the shortcut CTRL+Q to open the quick documentation popup.
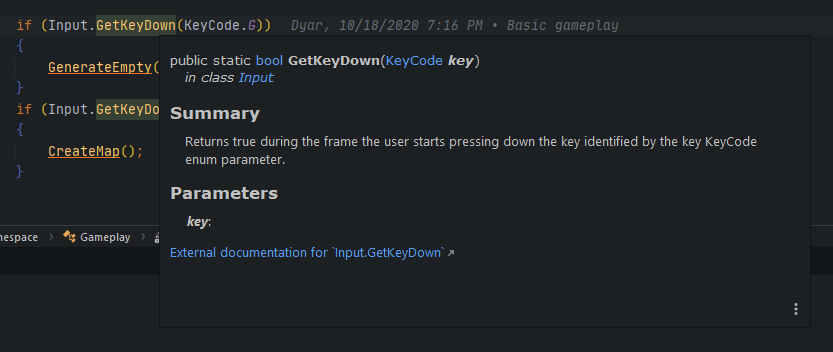
The popup for the “GetKeyDown” function of the Input class.
This window will tell you a functions parameters, return type, and a summary of what it does. Perhaps most importantly for unity development if you use this pop up on a unity class or function it will give you a link to the external documentation otherwise known as the scripting API which you should already be familiar with. Opening the scripting API right from Rider is extremely useful, and you should be using this feature constantly.
You can write in-code documentation for your own functions that will appear here. Learn more: https://docs.microsoft.com/en-us/dotnet/csharp/programming-guide/xmldoc/
Go to Definition
with your cursor on a function or variable name you can press ctrl+B to immediately move your window to where that variable or function was defined. You can also hold ctrl and click on the variable.
Careful! If you do this to one of Unity’s built-in features, Rider will unhelpfully open that code written by some unity software engineer in some file you shouldn’t be touching. This is almost certainly not what you want.
Sometimes you don't want to leave your current editor you just want to look something up in that case press control+shift+I which will open a popup window allowing you to look at the code from where this variable or function was defined. Neat.
More:https://www.jetbrains.com/help/rider/Quick_Definition.html?keymap=primary_intellij_windows
Navigate Previous and Next Location
Ctrl+Alt+Left and Ctrl+Alt+Right will move your cursor to the previous/next place it was. Great for quickly jumping between typing locations without having to scroll around or click through file tabs. Just try it!
The ToDo List
Type a comment with the word “todo” (no space) in it and writer will automatically find and highlight that comment. It will add the comment to a todo list that you can easily see and look through. Find the ‘TODO:’ window along the bottom. It displays the full comment from your code. You can write reminder todo’s is all over the place exactly where they are relevant, and then look at them from one handy window.

The TODO window is easily accessible from a tab at the bottom of the rider window.
You may want to learn about Scopes. Then set up a scope for the TODO window that only looks at your scripts, or scripts in a certain folder in your assets. That way you won’t see todo comments written by other people’s code in Unity or things you got on the asset store.
My Favorite Plugins
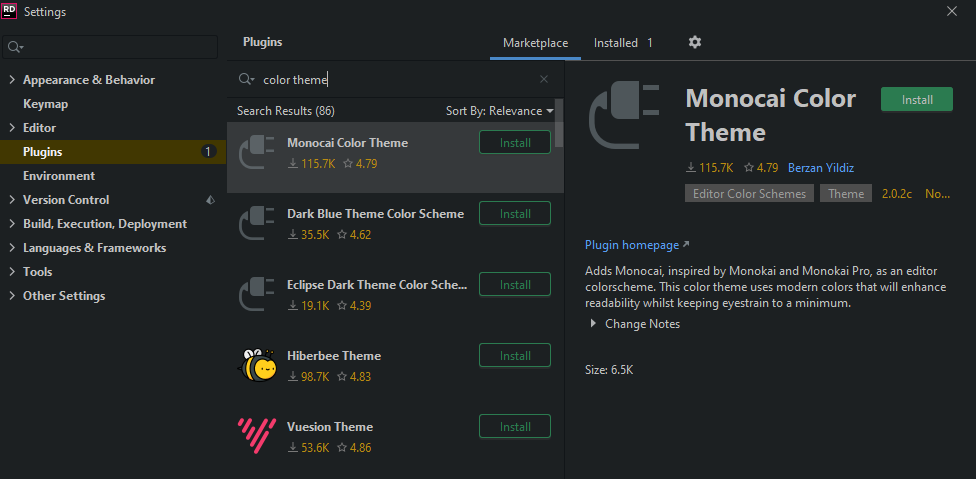
To Install a plugin, go to File>Settings… and find the “Plugins” section. At the top, select the “Marketplace” tab, and then you can simply search for the name of the plugin in the search bar.
I like to sort by Downloads to see the most popular plugins or themes.
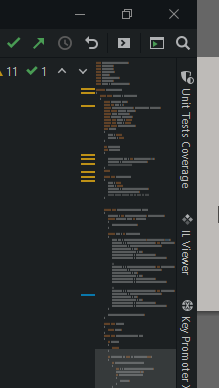
CodeGlance
CodeGlance turns your scrollbar into a minimap.
Rainbow Brackets
Rainbow Brackets colors opening and closing brackets to match each other and makes it easier to visually identify what goes with what. It makes deep functions or long complicated if statements just that much easier to parse.
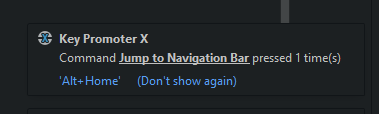
Key Promoter X
Key promoter as an unobtrusive popup box when a user feature that has a keyboard shortcut, gently reminding you what that shortcut is. Now you can just use rider like you normally do and learn shortcuts to features you use over time. This is nicer than having to sit down and memorize them intentionally.
CodeTogether
Code together is one of many plugins that offer functionality for something called pair programming.
Pair programming allows multiple users on different computers to edit the same text file at the same time. Sort of like Google Docs. It's amazing how useful and helpful this can be, especially while working on a team project.
If you are thinking of sharing your code over a zoom screenshare, seriously consider using a pair programming plugin instead.
I use CodeTogether because it's low-barrier to teach with. It allows a student to use their web browser without opening software or installing plugins. Code With Me, Floobits, GitDuck, GitLive, and more have their own pros and cons.
Nyaan Cat Progress Bar

Self-explanatory.